
Power
DIY Small Solar Power Projects for Beginners: Low-Cost Ways to Start Generating Your Own Energy

By Ephraim Rusk · · 10 min read
This article contains an affiliate link. If you buy through it, we may earn a commission at no extra cost to you.
Quick answer
Beginners can start generating small amounts of solar power for under $150 using portable panels, basic charge controllers, and a battery — no permits, no roof work, and no professional installer required. Experimental DIY concepts like 3D solar sphere builds exist at a lower price point but should be treated as unverified projects, not proven power solutions.
Low-cost DIY solar power projects for beginners are a legitimate starting point for any household that wants to reduce grid dependence without taking out a second mortgage. The average residential solar installation in the United States runs between $15,000 and $30,000 before incentives — a number that prices out most prepper households who are still building their foundation. The good news is that you do not need a full rooftop system to start learning and producing.
There is a wide spectrum between 'nothing' and 'full off-grid solar array.' On that spectrum sit portable panel kits, small battery banks, balcony-mount systems, and various experimental DIY builds that hobbyists have been exploring for years. Some of those approaches are well-documented and reliable. Others are unproven concepts that should be treated as educational experiments rather than dependable power sources.
This article walks through the realistic small-scale solar options a beginner can actually pursue in 2026, what each one costs and delivers, and where the line sits between proven hardware and speculative builds. If you are trying to decide where to put your first few hundred dollars of preparedness budget on the power side, this is the right place to start.
What 'Small Solar' Actually Means for a Prepper Household
Small-scale solar for preparedness purposes means any system sized to power critical loads — not your whole house. A small solar setup in the prepper context typically targets a specific problem: keeping a phone charged during a grid outage, running a CPAP machine overnight, powering an LED lighting circuit, or maintaining a small refrigerator for medication storage.
The U.S. Department of Energy defines distributed generation as power produced at or near the point of use, and small rooftop or portable solar qualifies. That framing is useful because it resets expectations. You are not replacing the grid. You are creating a reliable fallback for the loads that matter most when the grid fails.
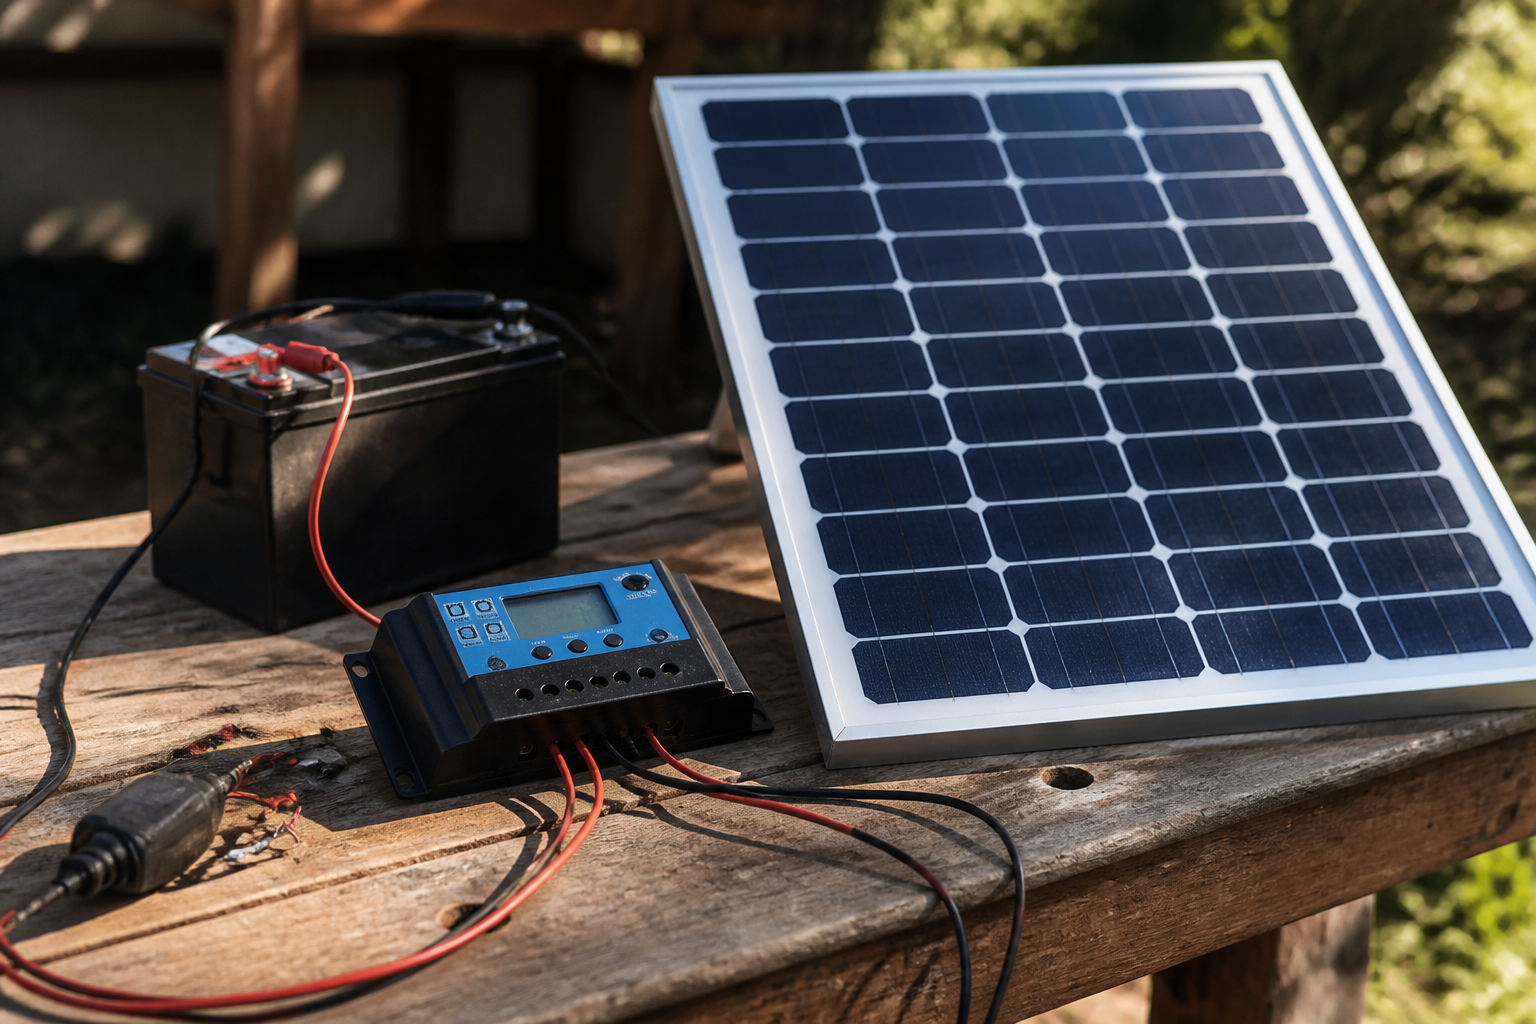
A functional beginner setup — one 100-watt panel, a basic PWM charge controller, and a 100Ah AGM battery — will run you roughly $120 to $200 in parts depending on sourcing. That system can charge phones, power LED lights, and run a small fan for 8 to 12 hours per day. It will not run a window AC unit or an electric range. Being honest with yourself about what you actually need to power is the most important first step.
Proven Entry-Level DIY Solar Builds (With Real Cost Ranges)
The most reliable beginner solar builds share three components: a photovoltaic panel, a charge controller, and a battery. Every other variation is built on top of that core.
A portable suitcase-style solar kit (typically two 50W panels with a folding frame) costs $80 to $150 and pairs directly with a portable power station or a simple charge controller and battery. These are the most forgiving entry point because they require no mounting, no wiring permits, and no roof access. You set them in a sunny spot, connect the clips, and you have power.
A fixed balcony or ground-mount system using one or two standard 100W to 200W panels, a 20-amp PWM or MPPT charge controller, and a 100Ah to 200Ah battery is the next step up. Total parts cost runs $200 to $500 depending on battery chemistry. LiFePO4 batteries last significantly longer than AGM but cost more upfront — typically $200 to $350 for a 100Ah unit versus $80 to $130 for AGM.
Adding a 300W to 600W pure-sine inverter to either system ($40 to $90) lets you power AC devices from the battery bank. At this level you can run a CPAP, charge laptops, and keep lights on through a multi-day outage. These are documented, tested configurations with established component specs and real performance data from the National Renewable Energy Laboratory and others.
- Portable suitcase kit: $80-$150, no installation required
- Single 100W panel + PWM controller + 100Ah AGM battery: $150-$220
- Single 200W panel + MPPT controller + 100Ah LiFePO4 battery: $350-$550
- Pure-sine inverter (300-600W) to power AC loads: add $40-$90
- Expandable: add panels and battery capacity as budget allows
Experimental DIY Solar Concepts: What They Are and Where the Limits Are
Beyond conventional flat-panel systems, a category of hobbyist and experimental solar builds exists — including 3D solar sphere and multi-angle concentrating designs — that claims to capture more diffuse light than a standard flat panel. These concepts are real areas of active research, but the gap between laboratory-scale exploration and a reliable home power source is significant.
The basic physics argument behind spherical or 3D solar geometries is that a curved surface can receive light from multiple angles simultaneously rather than requiring the panel to track the sun or be fixed at an optimal tilt. Some peer-reviewed research has explored 3D photovoltaic arrangements — a 2012 MIT study received attention for showing that 3D solar structures could generate significantly more energy per unit of land area in certain conditions. However, that research involved standard PV cells arranged in 3D configurations, not novel cell technology, and the results depended heavily on geography, season, and shading conditions.
DIY builds based on these concepts — using commonly available materials to construct a sphere or curved array — should be approached as learning projects, not as primary power sources. The output of a small handmade experimental device is likely to be modest and difficult to quantify without proper test equipment. If you build one, measure it honestly against a comparable flat panel and treat the data as your own experiment rather than a confirmed result.
This distinction matters for preparedness planning. An experimental build can be a valuable skill-development exercise, but it should not replace a known-quantity system when reliable backup power is the actual goal.
How to Size a Small Solar System Before You Buy Anything
Sizing your system before purchasing parts saves money and prevents the frustration of building something that doesn't meet your needs. The process takes about 30 minutes and requires nothing more than a notepad and your device specs.
Start by listing the critical loads you want to power during an outage. For each device, note the wattage (printed on the label or found in the manual) and the number of hours per day you need it to run. Multiply watts by hours to get watt-hours per day. Add them together. That is your daily load.
Next, factor in solar irradiance for your location. The National Renewable Energy Laboratory's PVWatts calculator is a free tool that shows average peak sun hours by ZIP code — this is the number you use to determine how many watts of panel you need to cover your daily load. Divide your daily watt-hour load by your peak sun hours to get the minimum panel wattage. Add 25 percent buffer for real-world losses.
Battery sizing follows a similar logic: most systems are designed to store one to three days of load without solar input. Multiply your daily load by the number of days of backup you want, then divide by 0.5 if using AGM (you should only discharge to 50% to protect the battery) or 0.8 for LiFePO4. That gives you the usable amp-hours you need at your system voltage (typically 12V).
- Step 1: List critical devices, their wattage, and daily hours of use
- Step 2: Calculate daily watt-hour load (watts x hours, then sum)
- Step 3: Find peak sun hours for your location using NREL PVWatts
- Step 4: Divide daily load by peak sun hours, add 25% buffer = panel size
- Step 5: Multiply daily load by backup days, divide by depth-of-discharge = battery size
- Step 6: Add inverter only if you need AC output
Our Recommendation: Solar Innovator
The core problem this article addresses is real: most prepper households know they need some form of backup power generation, but the entry cost of a proven conventional system — even a small one — still represents a meaningful investment that many households are not ready to make all at once.
The practical DIY route (panels, controller, battery) is reliable, but it still requires sourcing multiple components, understanding how they connect, and committing a few hundred dollars before you have confirmed the concept works for your situation. That friction stops a lot of people from starting at all, and a household with no backup power capability is more vulnerable than one with even a modest experimental setup running in parallel with a conventional build.
Solar Innovator is a $39 digital guide that teaches you how to build a small 3D solar-sphere-style device as a DIY project. The publisher's own sales page describes this as experimental, unverified technology — and that is exactly how you should approach it. This is not a replacement for a conventional solar setup, and we are not presenting it as one. What it is, is a low-cost way to engage with the underlying concepts of alternative solar geometries, develop hands-on building skills, and run your own honest experiment at a price point that does not require a large commitment. If you are the kind of person who learns best by building something and testing it yourself, this guide gives you a structured project to do that with. You can find it through the button below.
Our recommendation
Solar Innovator
Check availability →This article contains an affiliate link. If you buy through it, we may earn a commission at no extra cost to you.
Frequently asked questions
What is the cheapest way to start a DIY solar setup for beginners?
The cheapest functional starting point is a portable folding solar panel kit (around $80 to $150) paired with a small portable power station or a basic charge controller and AGM battery. This requires no installation, no permits, and no permanent mounting — you can be generating power the same day the parts arrive.
How much power can a small DIY solar setup actually produce?
A single 100-watt panel in a location receiving 4 to 5 peak sun hours per day will produce roughly 400 to 500 watt-hours daily under good conditions. That is enough to charge phones, run LED lighting, and operate a small fan or CPAP machine — but not enough to run large appliances.
Do I need a permit to install a small solar panel at home?
Portable and ground-mounted systems that are not connected to the utility grid generally do not require permits in most U.S. jurisdictions, but rules vary by state and municipality. Rooftop installations and any system connected to the grid almost always require permits and inspections. Check with your local building department before any permanent installation.
What is a 3D solar sphere and does it actually work better than a flat panel?
A 3D solar sphere is an experimental design concept where solar cells are arranged on a curved or spherical surface to capture light from multiple angles simultaneously. Some academic research has explored efficiency gains in 3D photovoltaic configurations under specific conditions, but small DIY versions of this concept have not been independently verified as producing more power than equivalent conventional panels. Treat any DIY build as an educational experiment and measure the results yourself.
What is the difference between a PWM and MPPT charge controller for a small solar system?
A PWM (pulse width modulation) controller is simpler and cheaper — typically $15 to $30 — and works well for small systems where the panel voltage closely matches the battery voltage. An MPPT (maximum power point tracking) controller is more efficient, especially in partial shade or when panel voltage is significantly higher than battery voltage, but costs more ($30 to $90+). For a basic beginner 12V system with a single 100W panel, a PWM controller is usually sufficient.
Related guides
Sources
- U.S. Department of Energy — Distributed Generation of Electricity and Its Environmental Impacts
- NREL PVWatts Calculator — National Renewable Energy Laboratory
- U.S. Department of Energy — Homeowner's Guide to Going Solar
General preparedness information, not medical or legal advice. Follow instructions from your local emergency authority during an active event.
Field notes by email
Get the next guide before you need it
One email when a new field guide drops — water, food, power, medicine. No spam, no daily noise, unsubscribe in one click.
Comments on this guide
Questions, corrections and field reports from your own setup are welcome.
No comments yet. Be the first to add a field report.